Working Tutorial
Once you’ve registered and explored the catalog, you’re ready to start working in Wildfire Commons. This tutorial will walk you through the essential steps to get started:
-
Create your first Workspace
-
Work on your first Workspace
-
Create your first Project
-
Set up your first Group
Creating your first Workspace
1 - In your Hub, click New Workspace.
2 - Complete the workspace form.

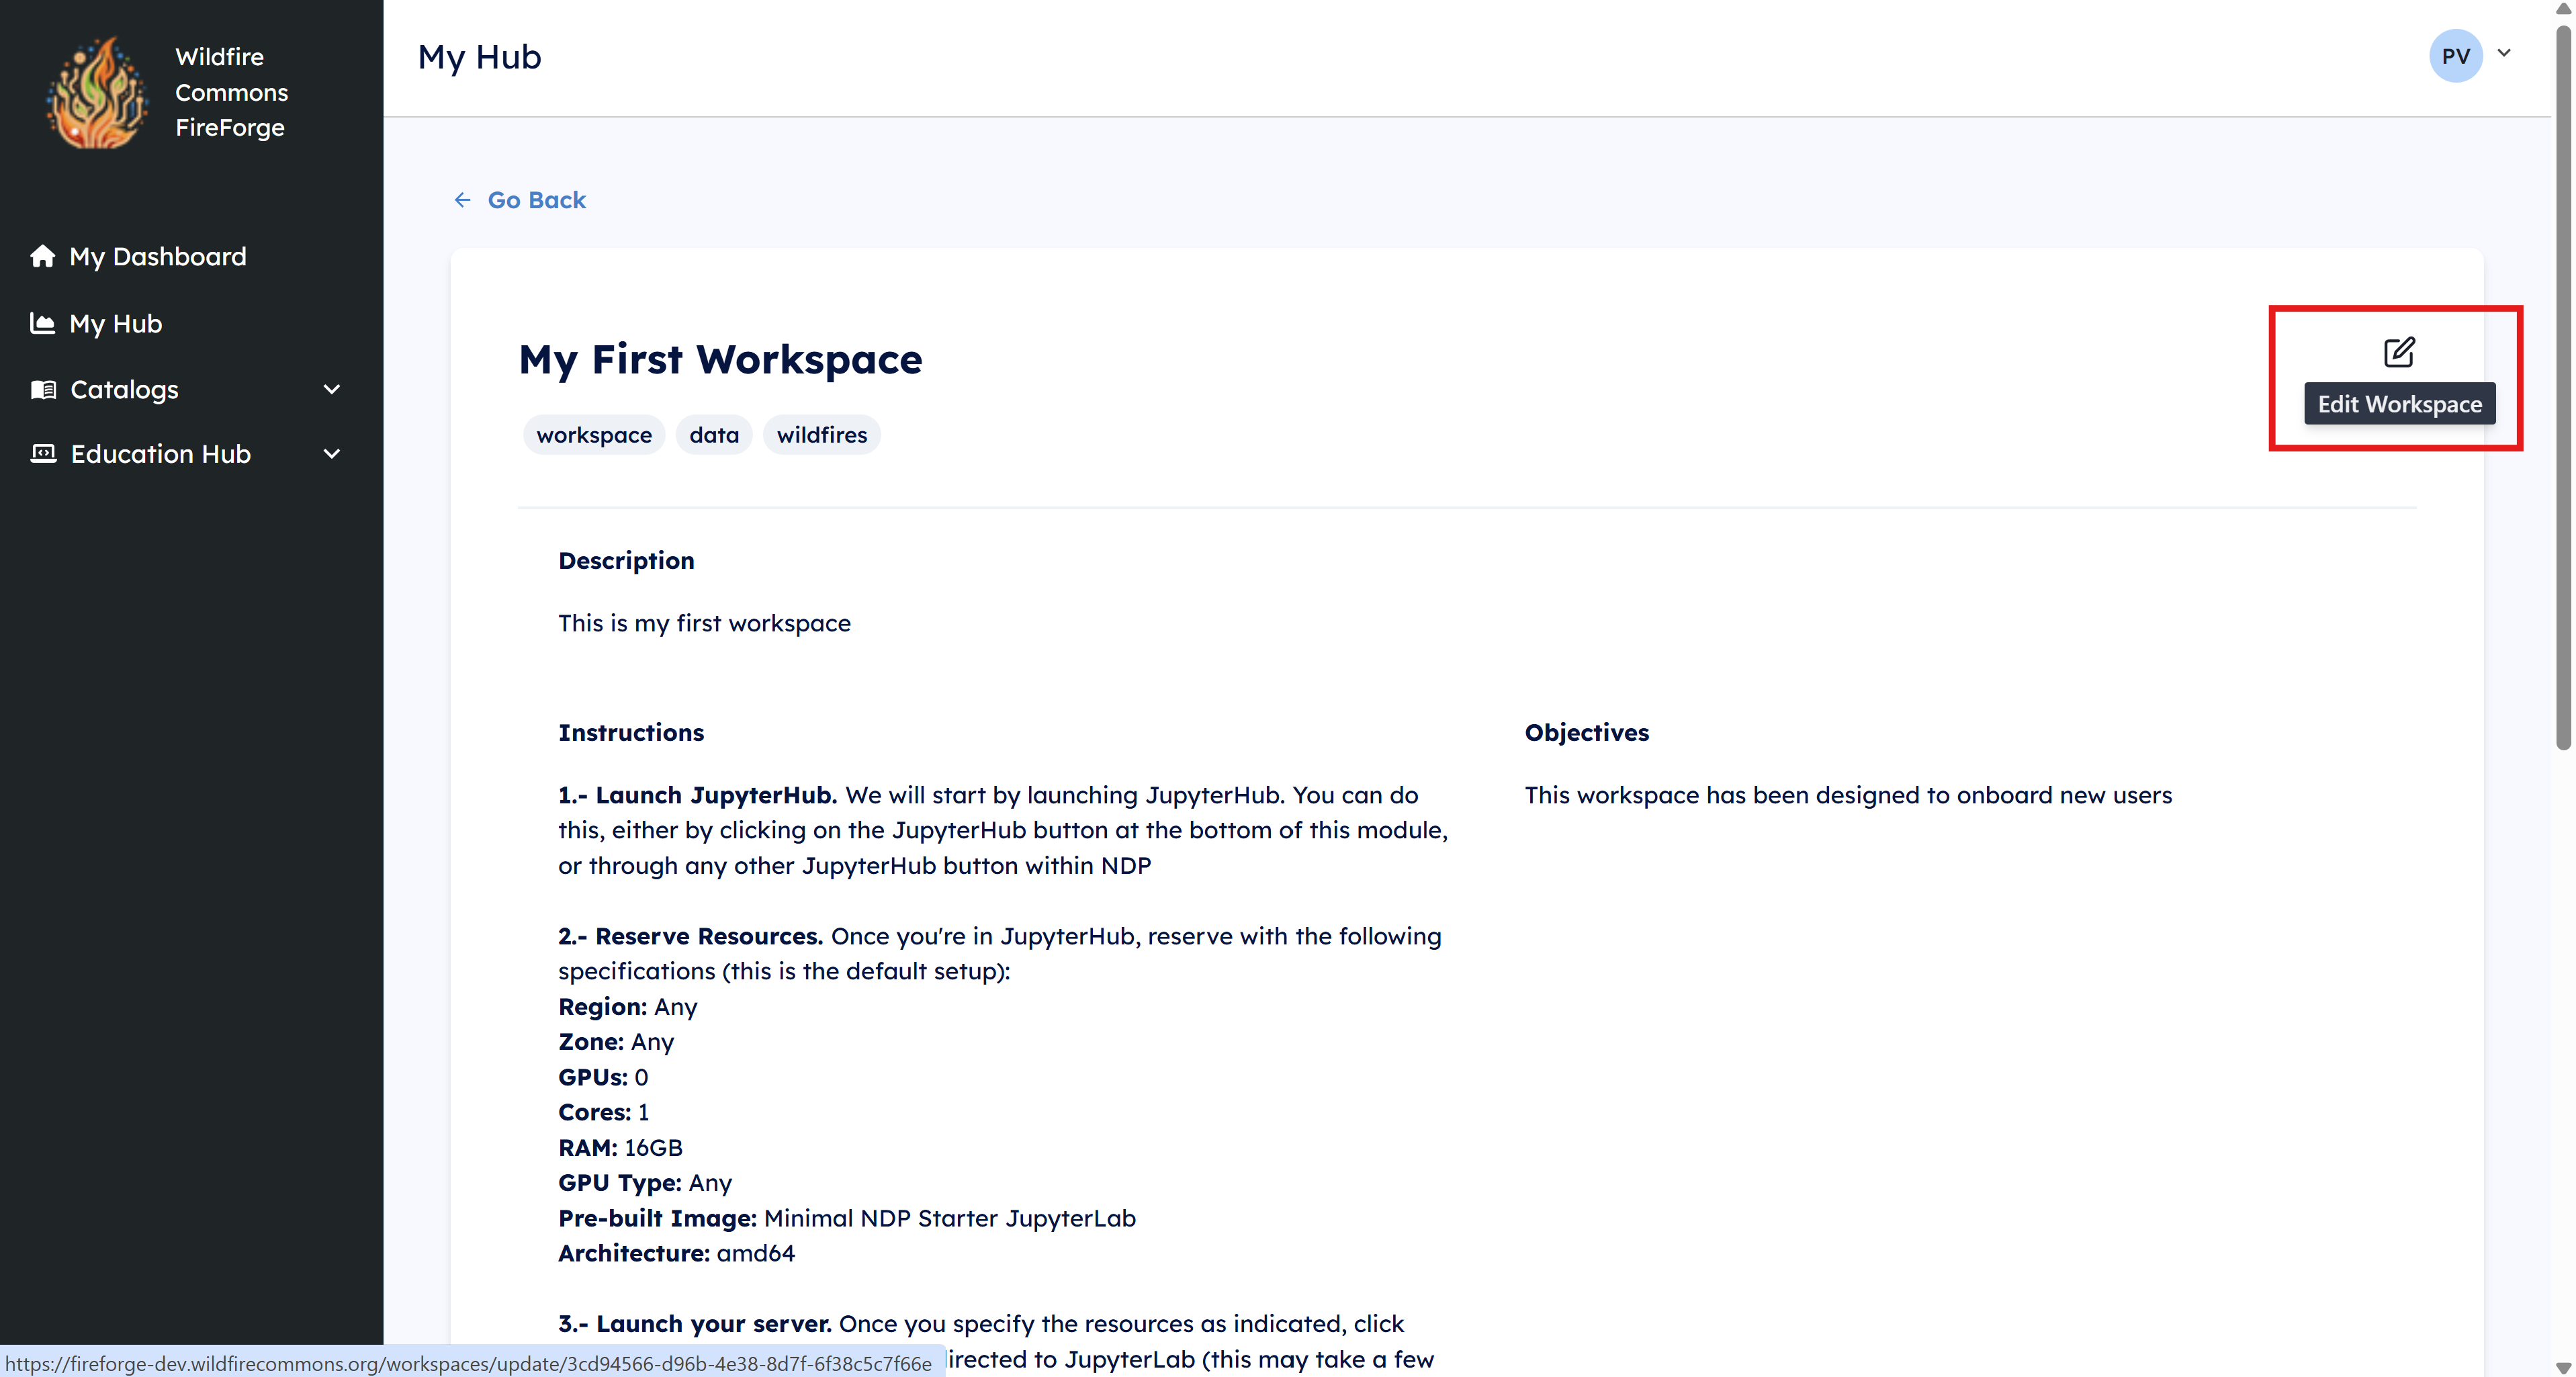
3 - Click Save Workspace. Your workspace will now be saved and ready to get resources added.
4 - You can make changes to your workspace form, by clicking on the Edit Workspace button.
5 - Click the Edit button next to Datasets. This will open a dataset search window.
6 - Search for HPWREN Weather, then click Add next to the HPWREN Weather Station Measurements dataset. Close the window once it's added.

7 - Click the Edit button next to Scripts. Paste the demo GitHub repository URL: https://github.com/WildfireScienceTechnologyCommons/first-workspace.git. Then click Add from external link. Close the window once the repository is added.

8 - Under Additional Resources, add the following link: https://www.hpwren.ucsd.edu/. Press Enter to add the link as an additional resource.
Working on your first Workspace
1 - Scroll down and click the Launch Options button. Select NSF National Research Platform

2- Once in JupyterHub, reserve the following resources:
Region: West
Zone: UCSD
GPUs: 0
Cores: 1
RAM: 8 GB
GPU Type: Any
/dev/shm for pytorch: Do not check
Image: Minimal NDP Starter JupyterLab
Architecture: amd64
3 - Click on Start and wait for your server to start running.
NOTE If you encounter an error when launching the server:

-
Click Logout (top-right corner).
-
Log in again and repeat step 2.
4 - Once your server is ready, the left panel, locate the Widget. Click the Current Folder window.
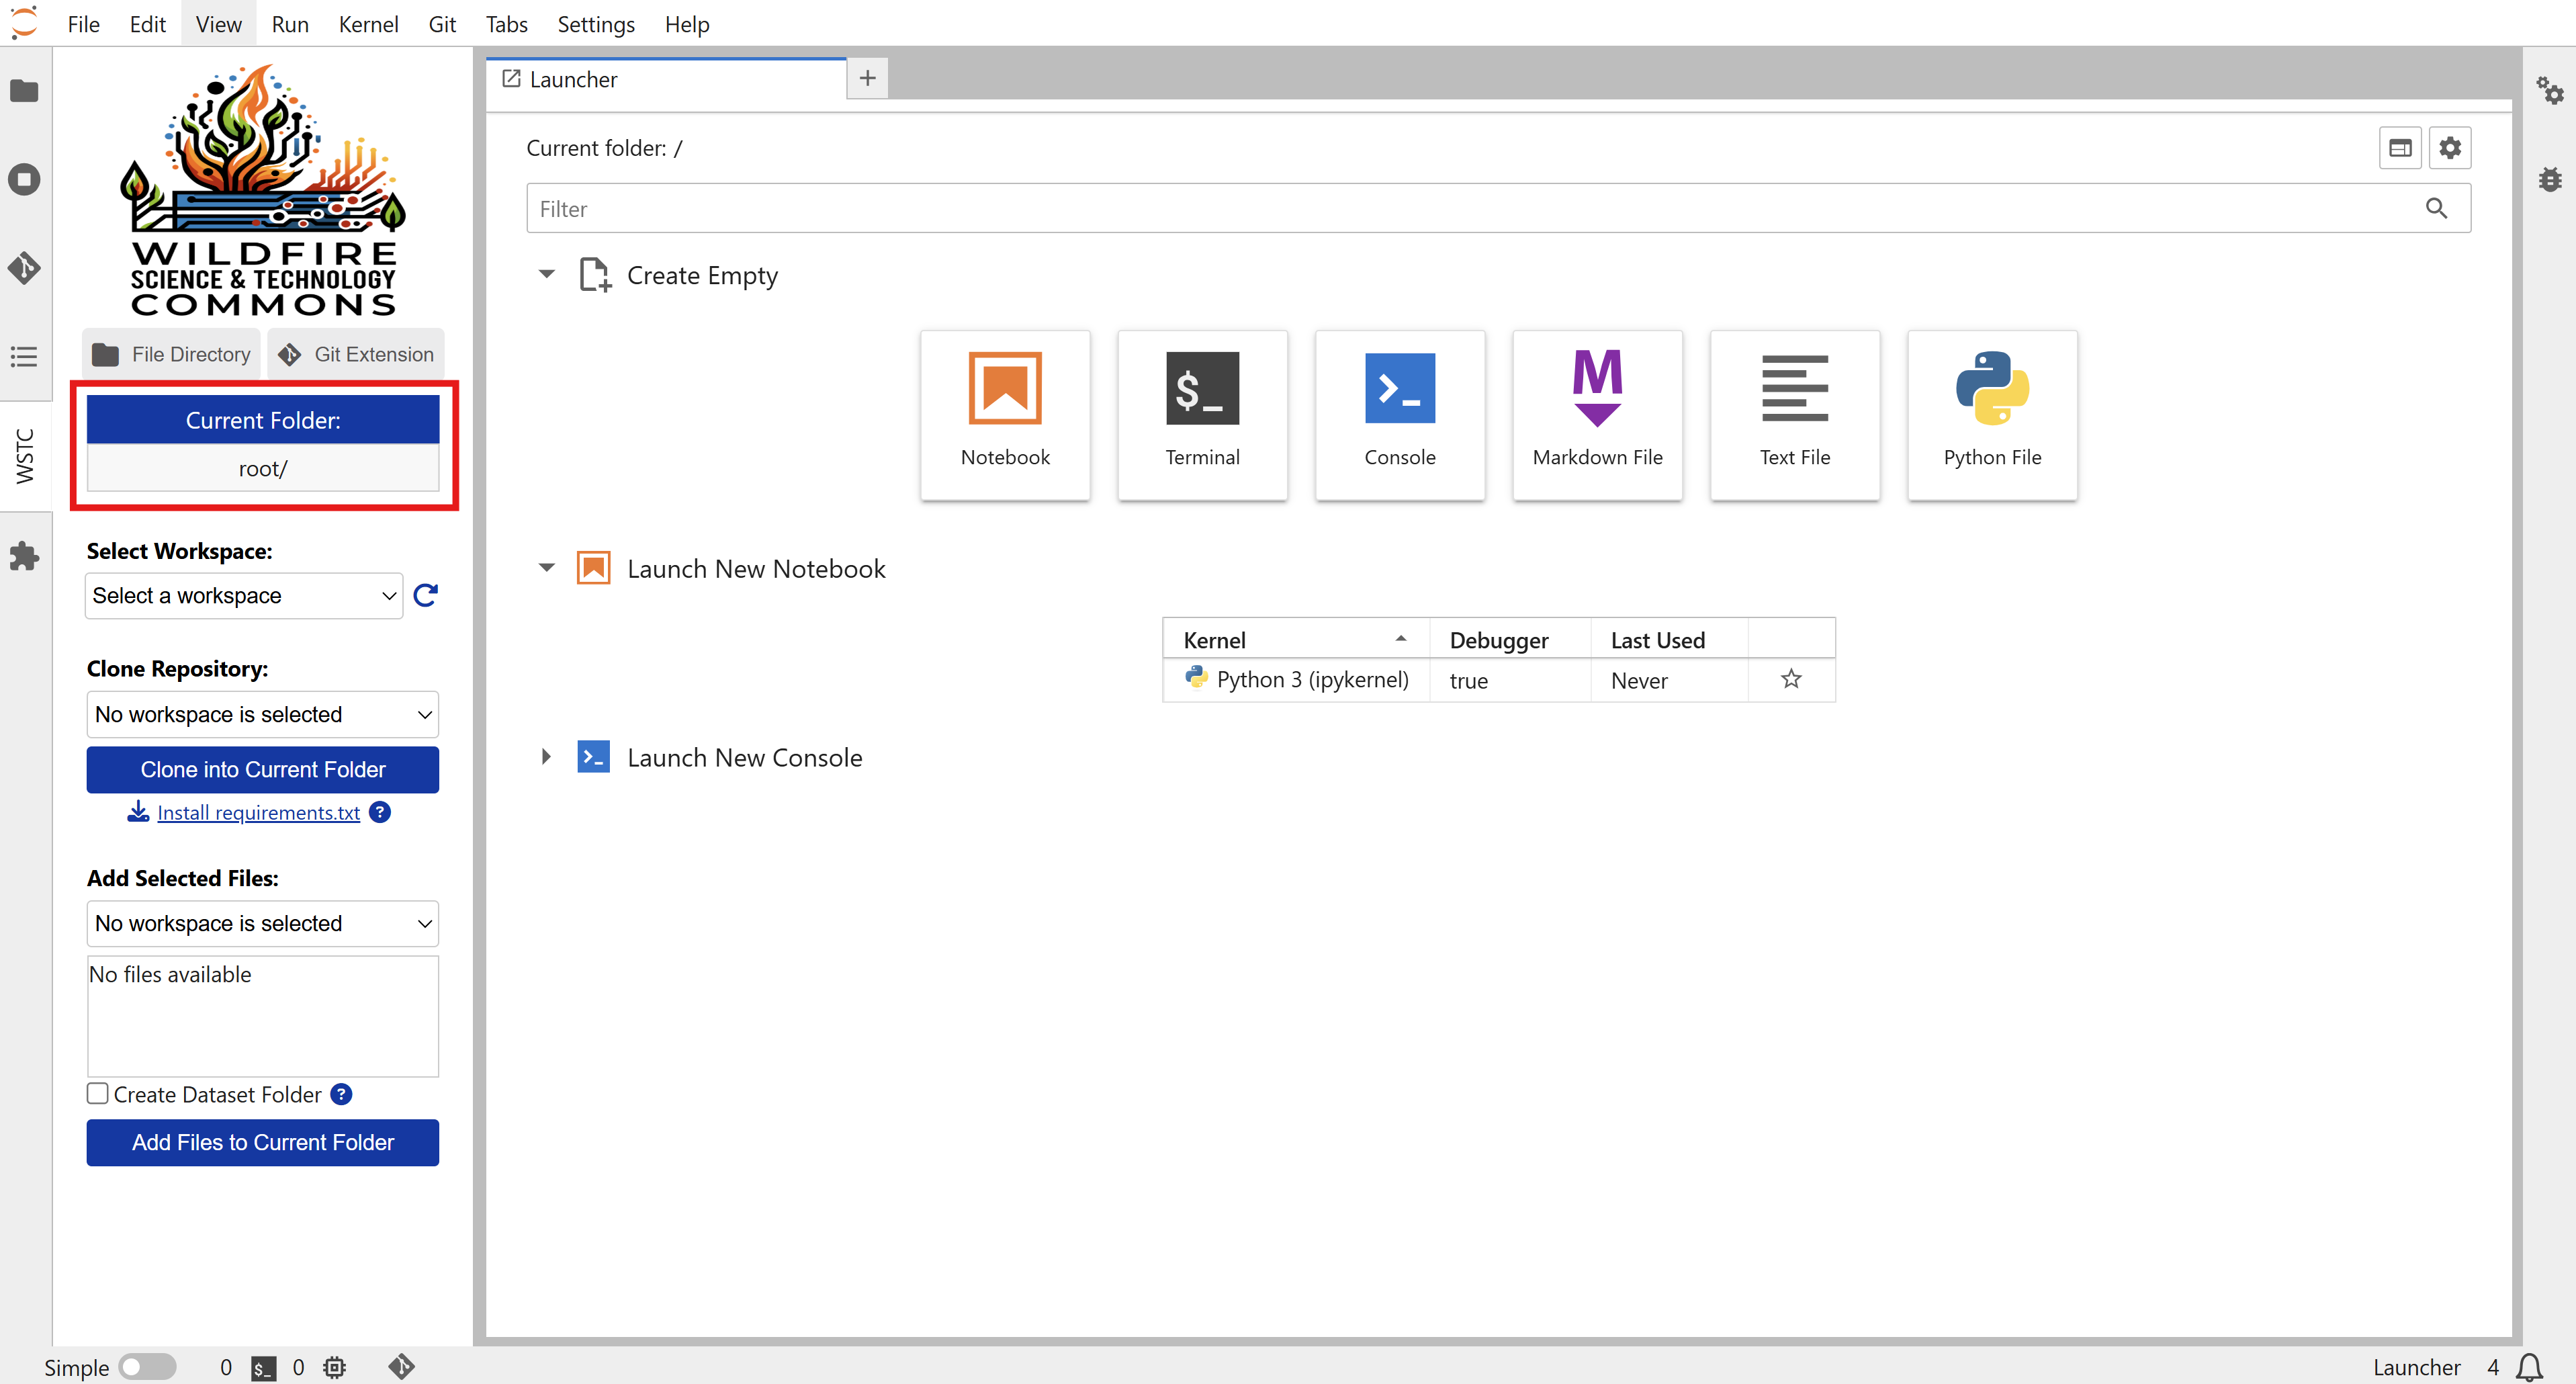
5 - Double-click on your User Persistent Storage to work in a folder with permanent storage (10GB limit).
6 - Return to the Widget by clicking the WSTC button on the left panel.

7 - Open the Select Workspace dropdown and choose My First Workspace.
8 - Click Clone into current folder and wait for the repository to finish cloning.

9 - Go back to Current Folder and open the newly created first-workspace directory.
10 - Return to the Widget, and click Install requirements.txt.
11 - Wait for the log file to appear.

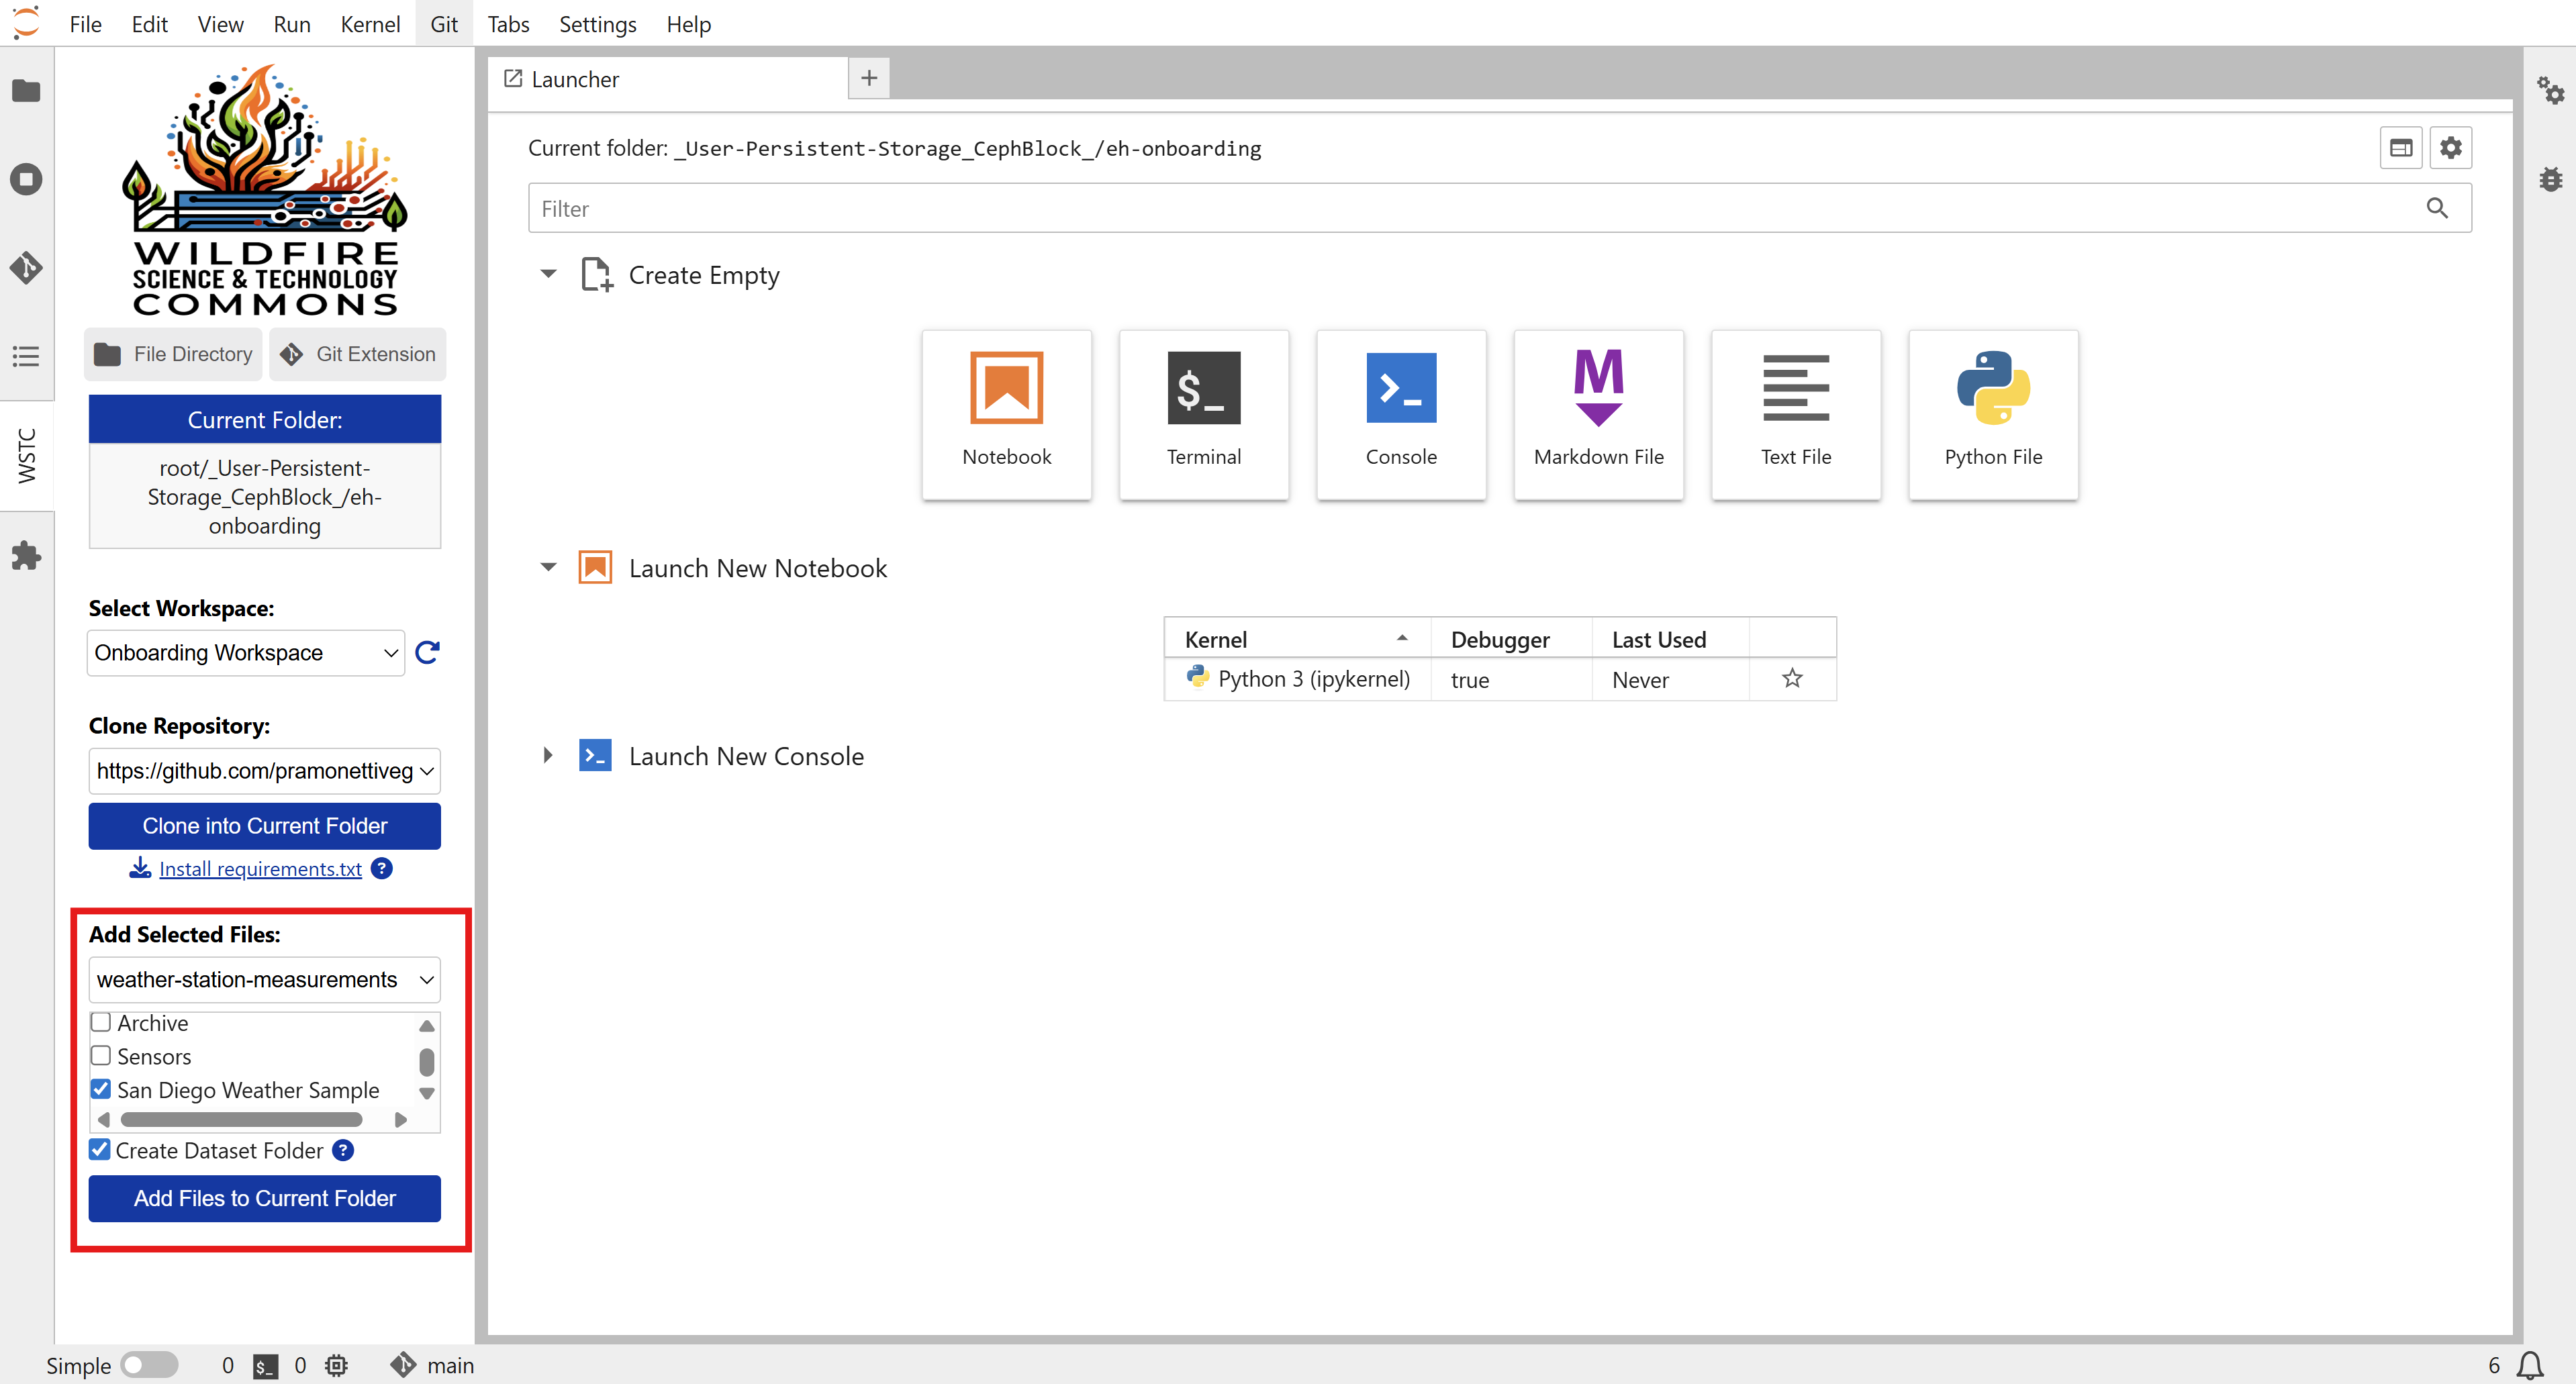
12 - In the Widget, under Add Selected Files, choose:
-
Dataset:
weather-station-measurements -
Resource:
San Diego Weather Sample
13- Check Create Dataset Folder and click Add resources to current folder to download the dataset. The download may take a few seconds.
14 - Go back to the Current Folder and open the first-workspace directory.
15 - Open the file onboarding.ipynb and complete it by following the instructions in the notebook.

16 - Once you complete your notebook, go to File (top left corner) → Hub Control Panel → Stop Server to shut down your server.

Creating your first Project
1 - On your Hub, click New CollabStudio and select Project
2 - Fill in the project creation form, including a title, description, and the participating institution(s).
3 - If the project is funded, select Yes to add lead investigator and funding organization information.
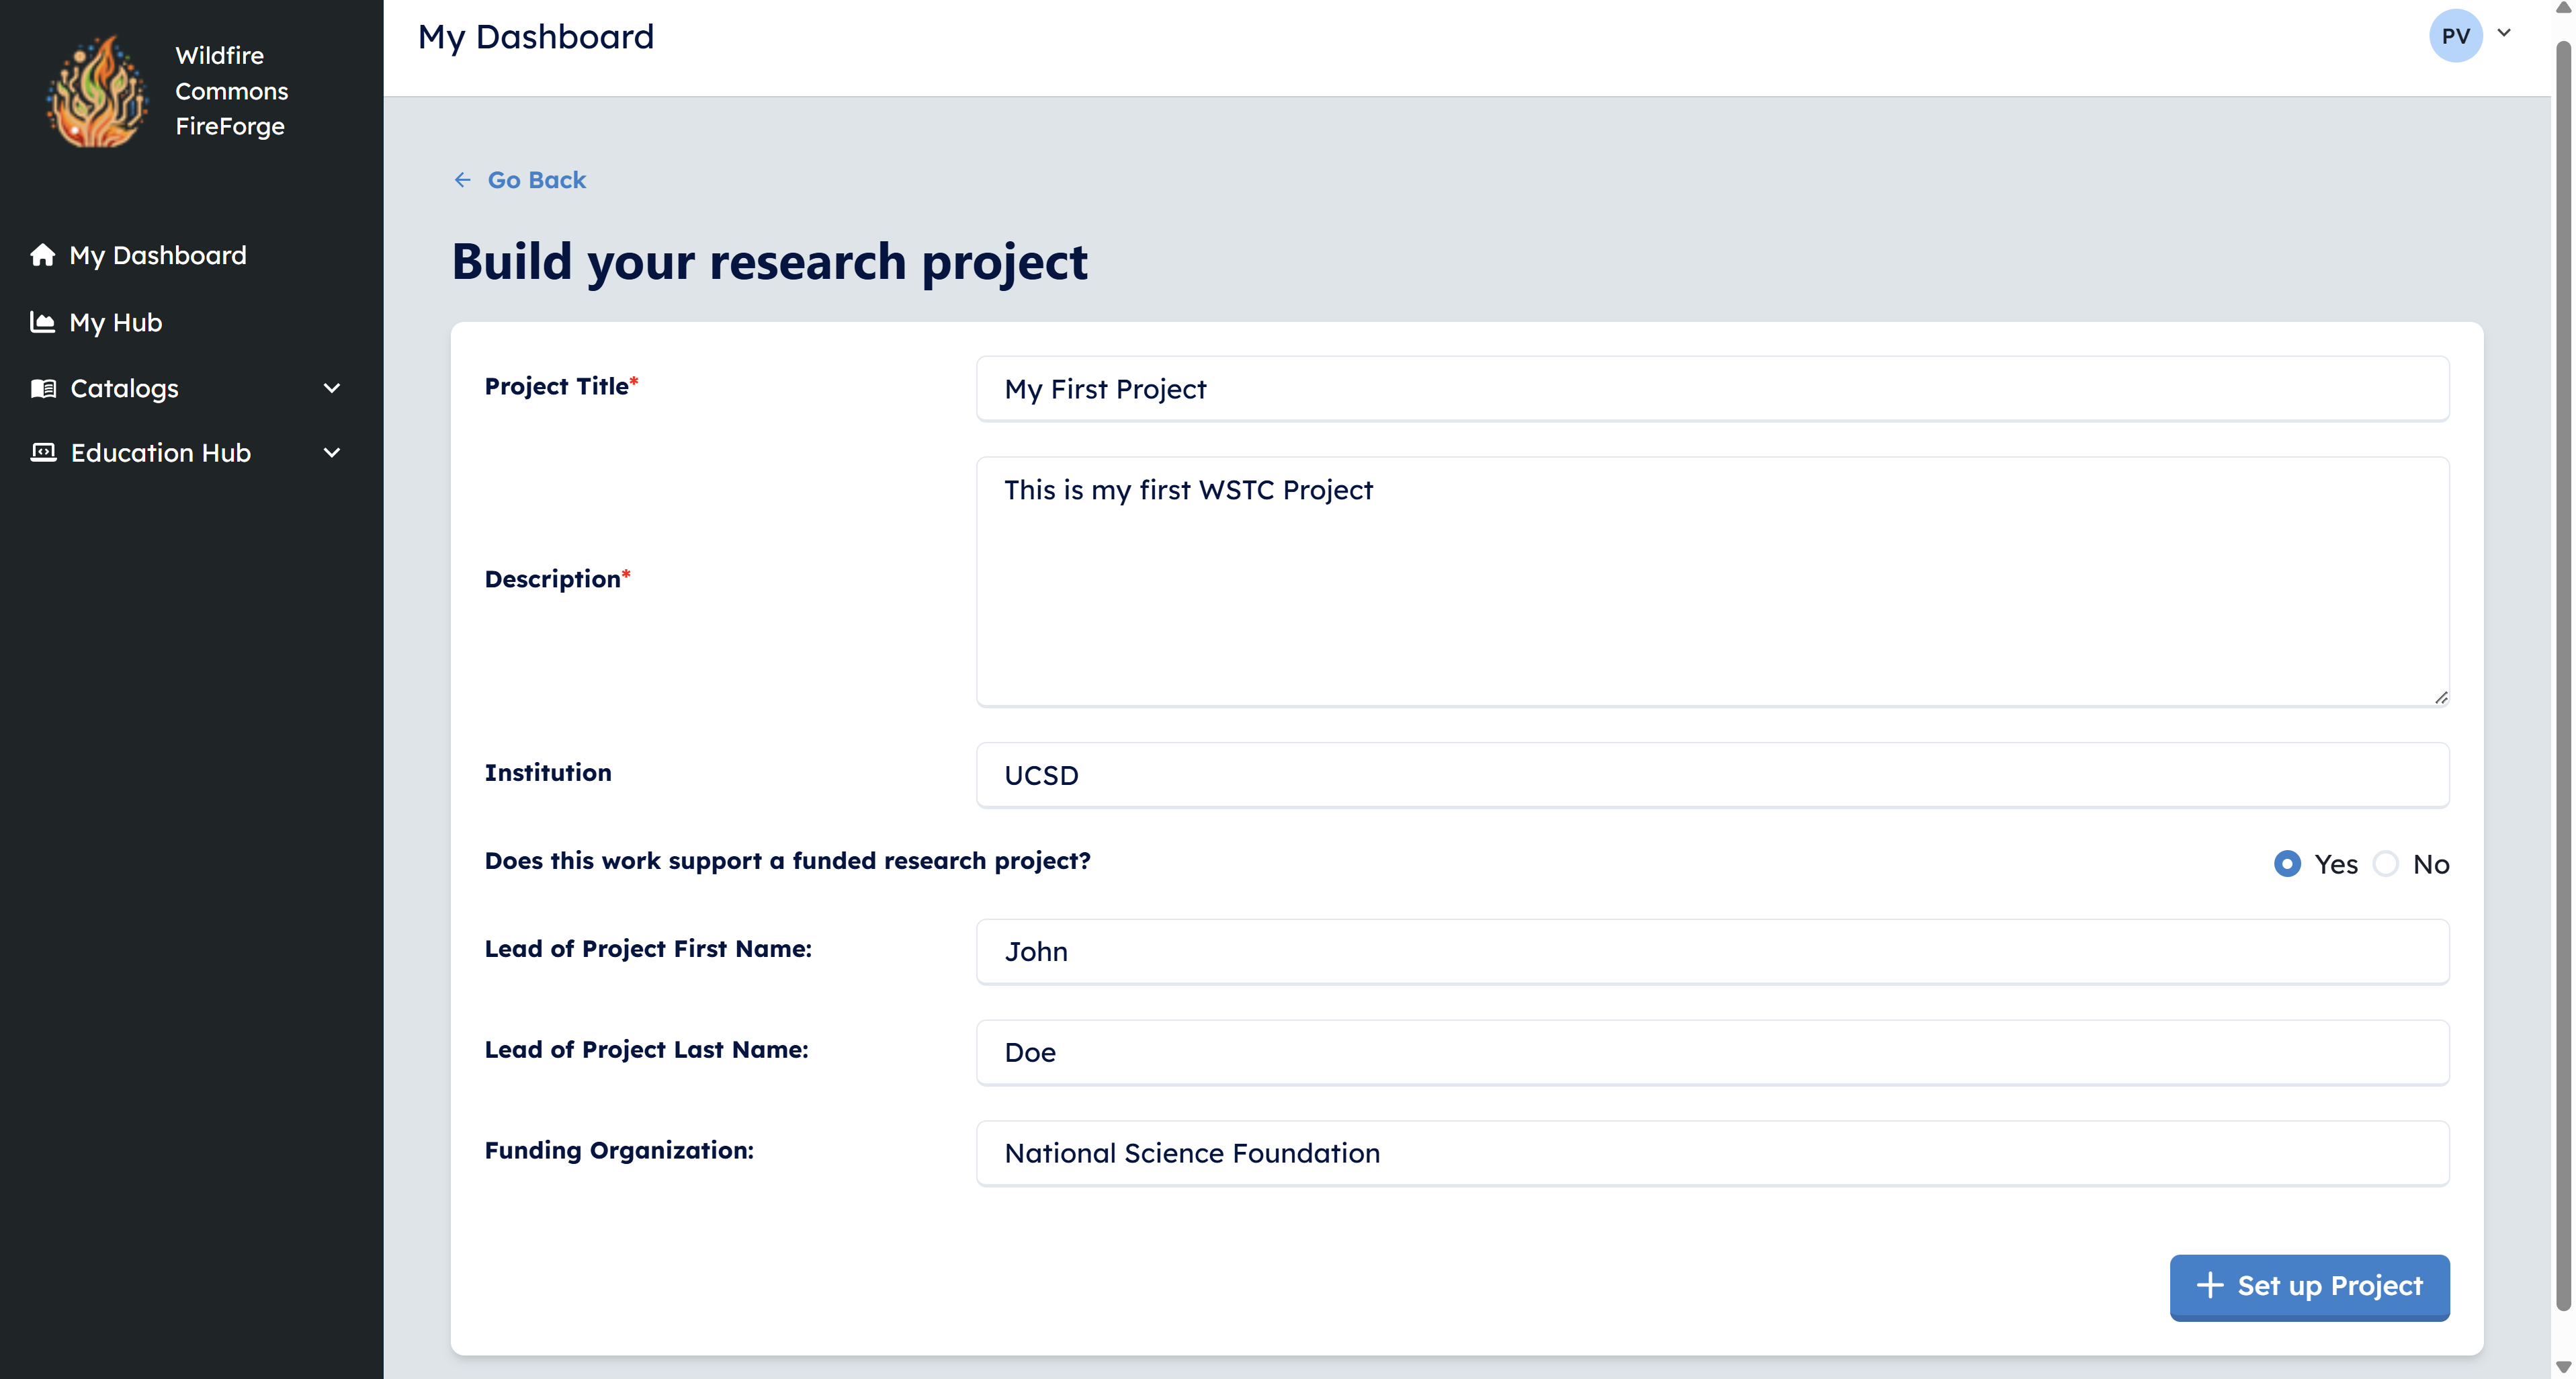
4 - Click Set up Project.
Groups
Groups enable collaboration within research projects. All group members share access to the same workspaces and a 5GB shared storage space in JupyterHub. You can have multiple groups under a single research project, but you can only contribute to groups you are a member of.
5 - Click Add a Group.
6 - Provide a name for your group. Avoid special characters and date formats, as this name will be used to create a shared folder in JupyterHub.
7 - Enter your email and the emails of other group members. If any email is not registered, an error will appear.

8 - Click Add group to save it. You can edit group members later if needed.
9 - Click Add a Workspace. You’ll see the list of workspaces. Add your first workspace. After adding it, all members of the group will be able to work and edit the workspace.
10 - Click Save Project to finalize your project setup.
Important Notes
-
Only the project creator can add new groups to a research project.
-
As a group creator, you can add or remove members. Group members (who didn’t create the group) can add new members but cannot remove existing ones.
-
You can create and edit workspaces within any group you belong to.